Warning: Reading this story may be hazardous to your productivity. The Web sites within may divert you from the dull tasks in need of your attention and may cause you to goof off for hours instead.
Oh, who are we kidding? You weren't going to get any work done today, anyway. So you might as well waste time in style--and these sites will help you do it. Figuring that you're already familiar with the Facebooks and YouTubes and Onions of the Net, we decided that any further serious undermining of your motivation to labor entailed digging up some obscure nuggets to commingle with the more familiar destinations. Our only criterion: Every site should be entertaining and habit-forming. And we found 'em--40 of 'em. Now just put up your privacy screen, kick back, and start clicking. Caveat: If you get caught, it won't do you any good to tell your boss that we're the ones who suggested it. And let me say for the record that I didn't waste any time on the organization of this list!
1.Stripgenerator
Hey, get your mind out of the gutter--Stripgenerator is about comic creation, not clothing removal--though we wouldn't claim that the two paths have never crossed. The site lets you build your very own customized comic strip in a matter of minutes. Choose from an array of characters and objects, and then bring your strip to life, one square at a time. If you're feeling particularly adventurous, sign up to start your own "strip blog" and have your content featured on the site's home page.
2. FMyLife
FMyLife (the site isn't entirely clear about what the "F" stands for, but "Flee" wouldn't be inappropriate) encourages people to send in anonymous real-life stories of worst-case scenarios that came horrifyingly true--things you'll just have to read to believe. The stories aren't always G-rated, so visit at your own discretion.
3. LivePlasma
A must-try for any music or film fanatic, LivePlasma helps you find new movies and music by building interactive maps around your current favorites. It's like six degrees of separation, customized to your cultural interests.
4. Cracked
The onetime competitor to Mad Magazine has reinvented itself as a Web site for all things funny. Cracked has an array of amusing lists, stories, and videos that'll keep you laughing for days.
5. BeFunky.com
Add some pizzazz to your profile pic with BeFunky.com. The site's Web-based application lets you easily morph any photo into a cartoony character or Warhol-like painting.
6. Funny Typos
Grammar geeks will delight in Funny Typos, a site devoted to ridiculing the language-challenged among us. Why people cant menage to reed there writhing batter is simpy a misery to me.
7. Safety Graphic Fun
Do park visitors generally need to be told "Please do not sit on crocodile"? Must employees at a company parking lot be reminded "Do Not Sleep Below the Vehicle"? Silly as these things sound, they're actual warnings posted on public safety signs. Safety Graphic Fun works to compile the most ridiculous placards, outlandish announcements, and attorney-inspired posterior papering from around the world, some of which are astonishingly absurd. My favorite: "Touching wires causes instant death. $200 fine."
8. Virtual NES
Go old-school and play dozens of original Nintendo games online. Once you get accustomed to the keyboard-based commands, even the most determined Koopa Troopas won't be able to pull you away.
9. Pogo
Find a wider selection of time-wasting games at Pogo. See if you can spell success in Scrabble, dominate at Dominoes, or ride the Reading Railroad to a sweet Monopoly victory.
10. Omegle
Interact with total strangers in the strange new world of Omegle. This simple site pops you into a one-on-one chat room with a random person, and there's no telling where the conversation may take you.
11. Lifehacker
Losing track of time is all too easy at Lifehacker. The blog teaches you tricks for navigating the complexity of life with fewer bumps, serving up advice on topics ranging from cooling a scorching car to clearing up circles under your eyes.
12. Answerbag
Answerbag is all about interesting and instant information. Post a query about almost anything and get answers within minutes, or browse through other people's Q&A to be enlightened, disgusted, and entertained
13. FailBlog
"Fail" is the blogger-adored modern stamp of disapproval for anything that falls below whatever arbitrary standard a critic feels like imposing. The proprietors of FailBlog.org open the "fail" doors to the world, encouraging readers to submit images of people, places, or things that in one way or another didn't work out right, and then inviting all visitors to vote on how many thumbs down the depicted blunder deserves. Whether the specimen under the FailBlog microscope is a poorly designed building or a curious case of inconsistent pricing, the site's findings are sure to generate some laughter wins.
14. Slashdot
Slashdot is the granddaddy of all tech time-wasters. Pursuing its mission of delivering "news for nerds," Slashdot posts a cornucopia of geeky information, complete with snarky comments and community discussion.
15. Fark
When you want a tantalizing tale with a sensational twist, turn your browser toward Fark. The site collects the Web's hottest and strangest stories, pointing you to standout content as well as to obscure local items that you might otherwise have missed.
16. Popurls
Popurls makes it easy for you to keep up with all of the Web's headlines. The jam-packed aggregator presents the most popular content from social media sites, news sites, and even video sites in a simple-to-use single page.
17. Fuzzwich
Step into the director's chair with Fuzzwich, a fun site that lets you build your own video animations. You pick the setting and the characters, and then customize them with faces cropped from your personal photos. Then, you use the site's editing program to move the characters around and have them interact. Once you get tot he stage of adding music and text bubbles, you'll be hooked. Fuzzwich even offers embed codes so you can show off your creation all over the Web.
18. Parents Joined Facebook
Parents and social media don't always mix. See sidesplitting screenshots of what happens when generations collide at My Parents Joined Facebook, a blog about uncomfortable family encounters in the virtual world. Remember, you can choose your friends but you can't choose your relatives.
19. Passive-Aggressive Notes
Oh-no-she-didn't. Indulge your inner Springer with a visit to Passive-Aggressive Notes, where you can take a long, leisurely inside look at other people's petty, infantile squabbles, all laced with not-so-subtle passive-aggressive undertones and innuendo.
20. Break.com
Videos that are just itching to go viral await you at Break.com. You'll find more funny, sexy, and scandalous clips here than you would in Paris Hilton's entire home-video collection--and that's saying something.
20 Fantastic Time-Wasting Web Sites
Photoshop Tutorials Sites
http://www.photoshopcafe.com
http://xen-fx.com/txt/
http://www.stab.se/aq/ny/index.htm
http://www.metaeffect.com/main.m4?go=main
http://deaddreamer.com
http://www.aovs02.dsl.pipex.com/
http://www.eyeballdesign.com
http://www.eyesondesign.net
http://www.spoono.com
http://robouk.gdesign.nl/
http://www.adobeevangelists.com/
http://www.planetphotoshop.com
http://showcase.netins.net/web/wolf359/linkotip.htm
http://www.neofrog.com
http://w1.243.telia.com/~u24308054/designstudios/
http://www.jlswebsoruce.com
http://www.piregwan.com/tutorials/
http://www.psworkshop.net
http://www.geocities.com/nessele/
http://webdeveloper.com/html/html_table_splicing.html
http://www.spoono.com/
http://www.dsigning.com/
http://www.opticnurve.com/
http://www.digitalwebgold.com/resources/tu...s.htm#photoshop
http://www.webslave.dircon.co.uk/photoshop/
http://www.algonet.se/~dip/photoshop/tips/tips_00.html
http://www.stewartstudio.com/tips/phototip.htm
http://strider-web.virtualave.net/
http://www.handson.nu/
http://www.screaming-art.com/tutorial14.php
http://www.photoshoptechniques.com/main/defaulth.html
http://www.tutorialhound.com/photoshop/tut...tutorials.shtml
http://www.absolutecross.com/
http://www.netcolony.com/arts/d5uga/Pshop/tuts.html
http://www.grafx-design.com/phototut.html
http://www.wetzelandcompany.com/MonthlyTipB.html
http://thetechnozone.com/macbuyersg...Photoshop6.html
http://www.thedesigncore.com
http://www.photoshopuser.com
http://www.gurusnetwork.com/tutorials/
http://www.effectlab.com
http://www.voidfx.com
http://www.iboost.com/build/software/pshop/index.html
http://www.espressographics.com/
http://users.iafrica.com/c/cu/cubic/vers/
http://www.deepspaceweb.com
http://www.cbtcafe.com/photoshop/
http://www.netcolony.com/arts/d5uga/Pshop/tuts.html
http://www.candeekis.com/alltutorials.html
http://thetechnozone.com/macbuyersguide/so...Photoshop6.html
http://www.shadowness.com
http://www.phong.com/tutorials
http://www.deviantart.com/thumbnails.php?sectioon=ps6
http://www.razorart.com
http://www.zeroplace.com/
http://www.liquidsoft.com
http://www.pixeljunction.com
http://www.thinkdan.com
http://www.solardreamstudios.com
http://www.tutorialfind.com/tutorials/adobe
http://www.wastedyouth.org
http://www.teamphotoshop.com
http://www.toeng.com
http://www.endeffect.com
http://www.turtleshell.com
http://www.aovs02.dsl.pipex.com/
http://www.cognitivedistortion.com
http://www.somethingleet.com
http://www.actionfx.com
http://graphicssoft.about.com/cs/ph...ls6/?once=true&
http://www.geocities.com/vitseeus/photoshop_recipes.htm
http://homepages.ihug.com.au/~mr_jr/tutorials.htm
http://www.hyperpark.com/
http://www.icehousedesigns.com/tutorials/photoshop/
http://the-internet-eye.com/HOWTO/default.htm
http://www.myjanee.com/jnetuts.htm
http://www.arraich.com/ps_intro.htm
http://jereme.gfxsites.net/
http://www.jlswebsource.com/tutorials.html
http://pionet.net/~jzeman/tips/contents.html
http://www.multimania.com/harvestr/logos/
http://www.iboost.com/build/software/pshop/index.html
http://www.icehousedesigns.com/tutorials/photoshop/
http://hotwired.lycos.com/webmonkey....html?tw=design
http://www.iservice.at/isset.html
http://www.itgraphics.com.au/tutorial/index.htm
http://www.visual-redemption.com/
http://mccannas.com/pshop/photosh0.htm
http://showcase.netins.net/web/wolf359/linkotip.htm
http://www.magicpixel.com.au/html/workwel.html
http://homepage.mac.com/markstrange...hoto~index.html
http://www.sketchpad.net/
http://www.netpedia.com/graphics/tips/
http://www.opticnurve.com/
http://www.orionnetlinks.com/Photoshop/ photoshop.asp
http://www.ozones.com/handson/
http://www.pageresource.com/
http://www.pagetutor.com/
http://www.pankpages.com/
http://www.piscespub.com/pcpp50.html
http://www.pixelpunk.8m.com/
http://www.espressographics.com/
http://www.evening.demon.co.uk/articles.html
http://www.eyeball-design.com/page09.htm
http://www.eyewire.com/tips/photoshop/
http://www.firelily.com/
http://www.freegraphics.com/10_Tutorials/Photoshop/
http://www.codewarrioru.com/CodeWarriorU/
http://www.webspace.com.br/opus/web3.htm
http://geda-online.com/
http://www.gifart.com/graphictips5.shtml
http://gliebster.com/
http://www.2ginc.com/
http://2.gograph.com/fusion/EN/E...op.cfm?jmpfos=1
http://www.goranation.com/
http://books.je-ideadesign.com/viewlets/psresources.htm
http://graphicssoft.about.com/libra...shop+6+Tutorial
http://ebmasters.net/tutorials/Photoshop/
http://user.fundy.net/morris/redire...photoshop.shtml
http://www.grafx-design.com/tutorials.html
http://www.gurusnetwork.com/
http://homepages.ihug.com.au/~mr_jr/tutorials.htm
http://www.hyperpark.com/
http://www.icehousedesigns.com/tutorials/photoshop/
http://the-internet-eye.com/HOWTO/default.htm
http://www.myjanee.com/jnetuts.htm
http://www.arraich.com/ps_intro.htm
http://jereme.gfxsites.net/
http://www.veraldar.net/ari/
http://webreference.com/graphics/column36/
http://www.bizark.com/
http://www.bluesfear.com/
http://www.webdevelopersjournal.com..._ad_banner.html
http://www.candeekis.com/alltutorials.html
http://www.cbtcafe.com/photoshop/
http://builder.cnet.com/webbuilding/0-7370.html
http://builder.cnet.com/webbuilding...-4279263-1.html
http://www.computerarts.co.uk/tutorials/2d/
http://www.cyberinkdesign.com/tutor.htm
http://www.dacort.com/tutorials.php
http://www.dalinise.com/
http://2achievesuccess.com/david/
http://misery.subnet.at/
http://www.thewebmachine.com
http://www.illustrateddesigns.com
http://www.tutorialized.com
http://pixel2life.com
http://www.good-tutorials.com/
How-to: Delete Undeletable Files
When you try to delete a file sometimes you may get this message
Cannot delete XXXXXXXXXX: It is being used by another person or program.
Close any programs that might be using the file and try again.
Make sure the disk is not full or write-protected and that the file is not currently in use.
The source or destination file may be in use.
Method #1 - Kill explorer.exe
Do successfully delete an undeletable file that is caught be the explorer.exe process (and most of them are) do the following:
Open a Command Prompt window and leave it open.
Close all open programs.
You now need to close EXPLORER.EXE. The proper way to shutdown Explorer is to raise the "Shut Down Windows" dialog (select "Shut Down..." from the start menu), hold down CTRL+SHIFT+ALT and press the CANCEL button. Explorer will exit cleanly.
Note: The at the 'Shut Down Windows' dialog method of closing Explorer is built into Explorer. (It was specifically designed so that developers writing Shell Extensions could get Explorer to release their Shell Extension DLLs while debugging them).
Go back to the Command Prompt window and change to the directory where the undeletable file is located in. At the command prompt type DEL where is the file you wish to delete.
Go back to Task Manager, click File, New Task and enter EXPLORER.EXE to restart the GUI shell.
Close Task Manager
Free up RAM to make Windows run faster
Here is a method you might like to use to free up RAM to make Windows run faster.
When programs run in Windows XP, they frequently use what are called DLLs (Dynamic-Link Libraries).
These contain shared programming instructions and other files like icons, graphics, sounds, etc. that different applications use in order to run. DLLs are stored in RAM whenever the applications load them; when you quit a program, XP is supposed to release the DLL from memory. But some DLLs can get stuck.
Here is the method to mend this up.
Step 1: You can force Windows XP to release DLLs by adding a Registry key.
Step 2: Select Start > Run >Enter regedit >Hit Ok
Step 3: This will open the Registry Editor and navigate to
My Computer -> HKEY_LOCAL_MACHINE -> SOFTWARE -> Microsoft -> Windows -> CurrentVersion -> Explorer.
Step 4: Right click on EXPLORER in the Left Pane, Select New > Key.
Step 5: Name it as AlwaysUnloadDLL and set the default value to 1.
Step 6: Restart Windows to activate the change.
Detect and Repairing Disk Errors
In previous versions of Windows, you would find a built in utility called ScanDisk. This utility exists in Windows XP but is called the Error Checking utility. So, in addition to running Disk Cleanup and Disk Defragmenter to optimize the performance of your computer, you can check the integrity of the files stored on your hard disk by running the Error Checking utility.
As you use your hard drive, it can develop bad sectors. Bad sectors slow down hard disk performance and sometimes make data writing (such as file saving) difficult, or even impossible. The Error Checking utility scans the hard drive for bad sectors, and scans for file system errors to see whether certain files or folders are misplaced.
To run the Error Checking utility:
Important: Be sure to close all files before running the Error Checking Utility. Any unsaved data will be lost.
1. Click Start, and then click My Computer.
2. In the My Computer window, right-click the hard disk you want to search for bad sectors, and then click Properties.
3. In the Properties dialog box, click the Tools tab.
4. Click the Check Now button.
5. In the Check Disk dialog box, select the Scan for and attempt recovery of bad sectors check box, and then click Start
6. If bad sectors are found, choose to fix them. Tip: Only select the Automatically fix file system errors check box if you think that your disk contains bad sectors.
Forgot Windows password ? Reset Windows password
If you forgot your Windows password you will not be able to login to windows.
So what to do in this case ? Is there a way to reset the Windows password ? Answer is yes, there is a way to reset or change the password.
Let’s see how we reset windows password.
There is a convenient way to do it with a Windows NT password recovery CD which can used to reset the password for any account in Windows NT ,Windows 2000 ,Windows XP , Windows Vista.
Follow the below steps to rest your windows password:
1. Download the ISO image from here and burn a CD with this ISO image file.
2. Boot your computer using this bootable CD created in step 1. You may need to set your CD-ROM as first boot device in BIOS in order to boot from it.
3. Once you boot your computer with this CD, you will get a command based interface which is quite self-explanatory. On first screen, press enter key to boot in default mode.It will show screen like this:
4. After you boot, it gives option, it will show the drive partitions and will give the choice, “Please select the partition number.” Press enter if windows is installed on C drive, else select the appropriate partition.
5. Now it will ask ” What is path of Windows directory ?”, press enter for default value.
6. Now it will show option “Select which part of registry to load” . Type 1 and press enter.
7. This will show the list of users on the windows. Type the name of the user for which you want to reset password and press enter.
8. Now it will show following choices
Clear the password
Edit password
Promote user
Unlock account
Quit
Press 1 and press enter.
9. It will show a message ” Password cleared ! “
10. It will give options to select another user, just type “!” (Exclamation mark) without quotes and press enter.
It will show previous menu, type q and press enter to quit from this menu.
11.Now it will show message ” About to write files back ! Do it ? [n] ” . Type “y” without quotes and press enter. It will show message “Edit Complete.
Note: You can also try again if it somehow failed. New run [n] ” Simple press enter.
12. Remove the bootable CD from the tray and restart your computer.
Password Cleared and Trouble Fixed !
How to restrict user's to access shutdown button?
This tip is very interesting for home and some small office users, who wants to restrict user's ability to shutdown their computer. You can hide the Shutdown button from the Start menu using registry editor and also restrict access to shutdown, if a user clicks on Ctrl+Alt+Del.
Follow the given steps to hide system shutdown button from start menu:
To use this feature, you will need to be logged into your computer with
administrative rights.
Click Start button and type regedit in Run option then press Enter for next.
Here locate the location to:
HKEY_CURRENT_USER\Software\Microsoft\Windows\CurrentVersion \Policies\Explorer
Here in right side panel, right click to create a new DWORD value with name NoClose.
Now assign number 1 to its value data box.
Now close the registry editor and restart your computer after any changes to go into effect.
But next time, if you want to unhide the shutdown button then simply change the value data box to 0 or delete this DWORD item.
Again close the registry editor and restart your computer after any changes to go into effect
How to install Ubuntu Linux from USB Stick
This tutorial describes how to install Ubuntu by copying the contents of the installation CD to an USB memory stick (aka flash drive) and making the stick bootable. This is handy for machines like ultra portable notebooks that do not have a CD drive but can boot from USB media.
In short here’s what you do:
Prepare the USB flash drive
Boot the computer from your USB flash drive.
Install Ubuntu as you would from a normal boot CD
Prerequisites
A running Ubuntu 8.04 or any ubuntu version installation
A USB device (stick, pen-drive, USB hard disk) that has already been formatted with FAT32 and has enough free space to hold your Ubuntu installation image
A Ubuntu CD image downloaded from the Ubuntu servers or mirrors (*.iso file) or from here
Step 1
On the root directory of your USB device, create a folder “install”
Copy the installer kernel and the initramdisk into this folder (Download source below.You need the files “vmlinux” and “initrd.gz”).
Download source for the installer kernel and initramdisk
For AMD64 Download from here
For i386 Download from here
You need to download the files “vmlinux” and “initrd.gz”.
Step 2
Note: You need to have the installer that fits the architecture of your Ubuntu version you want to install. In other words, you need a amd64 installer if you want to install an amd64 Ubuntu .iso image and the i386 installer for an i386 iso.
Step 3
From the installation iso image you downloaded, copy the folder “isolinux” to the root directory of your USB device (right-click on the .iso file, choose “extract here”). Rename “isolinux” into “syslinux”. Go inside the directroy “syslinux”. There, rename the file “isolinux.cfg” into “syslinux.cfg”.
Step 4
Make the stick bootable: Use fdisk to set the boot flag,
Install syslinux using the following command
sudo aptitude install syslinux
Now use syslinux to install a boot sector on your USB device
sudo syslinux /dev/sdbX
where sdbX is the device name and number of your USB device, check with “sudo mount”. A file called “ldlinux.sys” will be created in the root direcotry of the USB device.
Step 5
Copy the Ubuntu CD image in the root directory of your USB device (Contents of USB you can see as follows).If you are using i386 you need to copy the complete .iso image in to the root directory of your USB device.
Five Ways To Improve Your Computer’s Speed
Slow computer getting you down? Wish you could speed up your system so that games won’t crawl by like a slide show permanently set to slow? Well look no further! I shall share five easy steps that you can take to improve your system’s speed! Most of them are free of charge, and all of them should have some effect on your system. So without further ado, we begin with:
1. Remove spyware and adware from your system. Have you noticed recently that ads seem to pop up whenever you go to a Web page? Or that Internet speeds are about that of diseased livestock? Your system’s probably chock full of spyware. What to do? Well, thankfully there are several things you can do. First, download either Spybot-S&D or Lavasoft’s Ad-Aware, and run it. This should remove most if not all of the spyware and adware on your system. Neither of these are particularly robust, however, so we move on to:
2. Remove viruses from your system. Get yourself a decent virus scanner program. Big names include MacAfee, Symantec, or Norton. By the way it should be mentioned that virus scanners like the Big Three tend to be huge. Big, beefy programs that can chew up RAM faster than Dudley Dursley chewed up Harry’s birthday cake. If this is a problem for you, take a look at avast! avast! is a free virus scanner that can be downloaded, but be careful. Phishing sites love to pretend to be “free virus scanner software” and so you have to be careful. Yes, avast! is a respected name and is not a virus, but only if you actually download it and not some trojan.
3. Defragment your hard drive with the disk defragmentation tool, usually located in Start / Programs / Accessories / System Tools. This useful little program will improve performance by compacting your data so that your programs aren’t all located in tiny little bits. Some people might argue this point, saying that defragmentation doesn’t actually improve anything, but look at it this way: it never hurts at worst, and at best has a chance of improving your runtime! So where’s the loss?
4. Remove dust. Buy some cans of compressed air (yes I’m aware of the irony of purchasing a can of air. No, I do not wish to purchase any bridges today). Using this compressed air, blow the dust out of your system. That dust does your CPU no favors and a thick, liberal coating of dust tends to collect when you leave your computer running in a dirty room. Oh and by the way, after you’ve blown all that dust into the air, it’ll settle. All over your carpet. So you might wanna vacuum later. Just an idea.
5. Clean your registry. CCleaner is a good registry fixer that’ll fix all those broken things in your registry. By the way, don’t go mucking about in the registry without backing it up first. If you do not do this, then I cannot be legally responsible for any time rifts, space distortions, or world wars caused by unexpected changes made by CCleaner. That said, properly done, a registry change often helps in improving performance. Also check your startup programs: there are programs that are set to start as soon as Windoze boots, and this can cause Windoze to start up slower. Removing a few (AIM is a good one) might improve your startup process. You might keep your hair a bit longer, too.
One final bit of advice. Oftentimes I’ll see on PC-building Web sites people wondering why their computer is “running so slowly even though they have the best gear.” The word of advice? Check your PSU (Power Supply Unit). How far do you suppose you’d get if your car’s gas tank had a maximum capacity of 2 gallons of gas? Would you want such a car? Well, your “awesome gear” won’t get too far on a puny PSU either. If your computer’s operating much slower than you’d expect from your hardware, consider replacing your PSU with one that can actually handle your power-hungriest parts (usually your CPU and GPU). Calculators for what wattage of PSU you might need are all over the Web. Just to be safe it might be better to go 50 watts or so above the recommended, just in case you decide to add something else later.
How To Format USB Drive With NTFS File System
The advantage of NTFS file system is that it is fast and it has got security options. But the problem is that usually the USB drives are small enough that NTFS is not recommended for them. But nowadays the USB drives are coming with larger sizes. So it’s better to format a drive as NTFS than the traditional FAT32 of FAT file systems which have no security at all. Having NTFS file system on the USB drive has an advantage that one can configure the security of the drive so that it is write-able only on one system and becomes read only on all other systems. So you can read and write on your own system and transfer the files elsewhere without the fear of the virus infections etc as the drive becomes read-only in all other systems.
Usually when we want to format the USB drive, only FAT and FAT32 file systems are available for the format. Here is the trick by which you can format the drive with NTFS file system.
Plug in your USB drive
Go to Start –> Run –> devmgmt.msc
Device manager will open up. Expand Disk Drives. Right Click your USB drive and select Properties
Go to policies tab and select Optimize for performance
Click OK
Now go to My Computer, right click the USB drive and select Format
In the File system selection combo, the option of NTFS will be available now
Select NTFS and click Start.
Your USB drive will be formatted with NTFS file system. Now you can configure it’s security by right clicking the drive and going to properties –> security tab.
How to recover data from scratched CDs/DVDs
Scratched a DVD with some important files on it recently? One of my favorite TV shows ever is Lost. I find it to be interesting, but unfortunately, it also sucks up a lot of my hard drive space, with each episode at over 350mbs. I lose quite a bit of hard drive space due to this show, and that’s just that one show, not including other shows like Heroes or House. So, just like every other guy in this world, I burn the shows onto DVDs, as it’s a cheap and easily accessible way to store data. But the only problem with this is the fact that CDs or DVDs aren’t invulnerable to all types of damage, and in fact, even a small finger print or scratch can make a DVD/CD player not able to read the disk. The main reason why the players can’t read the disk is because the damaged part of the disk doesn’t contain any data. If you try to copy-and-paste the file on the damaged disk onto a computer, you usually get an error saying the file is corrupted, or damaged. So, after losing many disks, and spending many hours of re-burning, and re-burning, I finally put my foot down and looked for some methods to recover data from damaged CDs or DVDs. I found some totally weird methods involving toothpaste, banana skins, even candle wax, but I also found some really handy programs, which I thought I’d share with you all today. The way these programs work is by copying out the entire file, just skipping out on the damaged part, so it allows you to salvage the majority of the file. Method 1: Roadkil’s Unstoppable Copier 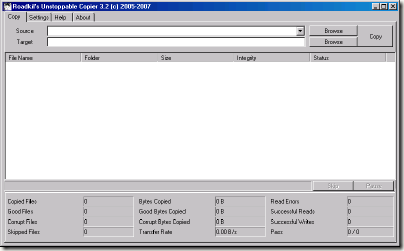
Roadkil’s Unstoppable Cleaner recovers files from any kind of damaged disk. It allows you to copy files from disks that give ‘corruption‘ errors, and those that are scratched. The program attempts to recover all the parts of the file that are still readable, and ignore the damaged parts. The program is tiny, and it needs no installation, so you can just jump straight in. Method 2: CD Recovery Toolbox 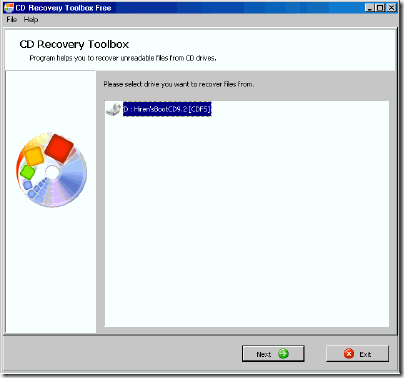
CD Recovery Toolbox supports a vast range of disks - CD, DVD, HD DVD, Blu Ray and so on. Basically, it recovers data off disks with physical damage (chipping, scratches) or some some sort of incorrect recording. So there you have it, a few good ways of recovering data that seemed forever lost on a damaged disk. Just remember that you’ll have a part of you file that will be missing, the part that was originally damaged, as these programs don’t repair the disk, but instead recover all other parts of the file. So, for example, if you’re watching a film, 2 minutes of the film might be skipped, due to the fact that the part skipped was damaged
Disable/Enable USB Drive
USB drives are mostly used for transferring of data from one computer to other. However, it is possible to disable or enable (incase of a virus has disabled it) the USB drive using some registry tweaks and no third party software. The whole procedure is divided into two steps both of which should be completed. Note: Make sure you know how to safely edit the registry.
To disable the USB drive, first:
Open Registry Editor. (Start->Run->”regedit”)
Navigate to HKLM\System\CurrentControlSet\Services\USBstor
Change the value of the dword “Start” from 3 to 4. If the dword “Start” doesn’t exist, create it.
Exit Registry Editor

Second thing to do is to change the permissions on the USBSTOR key. You need to DENY full control on the “system” group. You can do that by right clicking on the USBSTOR, clicking permission and removing everyone, except yourself.
In case the USB drives are disabled, you just have to open registry editor and revert the settings provided above.
Alternatively you can also download the the freeware provided below courtesy of Intelliadmin.
[Download USB Disabler
How To Uninstall An Application That Has No Uninstall Program ?
*If you want to uninstall an application that has no uninstall program and it is not listed in the Add/Remove applet of Control Panel (or that uninstall doesn't work), then just delete the directory/files.
Make a backup of the registry
Shutdown the application, if it is running (If WinNT+ check also for services)
Search the registry for any references to the directory where the application resides, and remove them
Search the registry for any references to the name of the application, and remove them
Start Regedit and drill down to :
[HKEY_CURRENT_USER \Software \]
[HKEY_LOCAL_MACHINE \Software \]
[HKEY_LOCAL_MACHINE \Software \Microsoft \Windows \CurrentVersion \SharedDLLs]Rename the directory in which the application was installed in the first place
Reboot and if everything goes well, then delete the renamed directory
Use Explorer to to remove the entries from the Start Menu in either
C:\Documents and Folders\All Users\Start Menu\Programs\ and/or
C:\Documents and Folders\(your username)\Start Menu\Programs\
If there is an entry in the Add/Remove list, start regedit go to:
HKEY_LOCAL_MACHINE\SOFTWARE\Microsoft\Windows\CurrentVersion\Uninstall
Locate the entry and delete it. If the app has a service, edit:
HKEY_LOCAL_MACHINE\System\CurrentControlSet\Services
and scroll down till you locate it. Then delete it. If this app starts automatically and there is no entry in the StartUp folder(s), then use Regedt32 to edit:
HKEY_CURRENT_USER\Software\Microsoft\WindowsNT\CurrentVersion\Windows
Customize “Send to” to send files anywhere on right click
If you want to move same time type of files again and again to the same place then this trick will be helpful to you. Rather than copy and pasting the file by browsing directories or keeping a shortcut pointing to that location on your Desktop, there’s an even easier (and more flexible) way to quickly move files to a favorite place. Yes, this can done by customizing “Send to” right click windows menu.
The trick is short and simple, it goes here:
Select the Folder where you want to send to files generally and create short to it there itself.
Go to directory “C:\Documents and Settings\Rohit\SendTo” (replace Rohit with username of your PC.
Copy that shortcut created in Step 1 to this directory and you are done!
Now you will be able to see the name of specified folder in Right click “Send to” menu. Here’s the preview- I have specified “D:\Rock on” to be shown in send to menu.
Note : Destination of SendTo folder may vary in case you have two Operating systems or installed Windows on other partition except C drive.
Such Directories are hidden so, you will need to select “Show Hidden Files and Flders” from Folder options.